

The Groundwork - A Guide To Setting Up Your Malware Analysis Lab.
A step by step approach on how to get everything set up with no steps left out.


Before we analyze any malware species, we have to set up our environment to be safe from the malware we would be detonating as we take on this challenge.
I am taking this from my notes from Matt Kiely's PMAT course which you can find on TCM Academy or find 5 hours of the course on youtube which I'm using as my guide.
Before we jump ahead of ourselves let's talk about your systems requirements
At least 8GB of RAM or more
150GB or more HDD
Useful Links and Resources
Virtual box (Can take snapshots for free )
Windows 10 64 Bit You can search: Windows Evaluation Center or Download Windows 10 enterprise
To keep our host organized create a document where you can store all your VMs and ISOs.
Setting up our lab
Build and configure our virtual lab environment
Creating a virtual machine on Virtual Box is straightforward but if you need help I recommend watching this youtube video and remembering to take a snapshot.
Download and install chrome on your windows VM, search for "flare vm github" or navigate to the repository on github.
Note: You need enough storage for this one! More than 100GB ( It takes at least 40GB )
Open Powershell as administrator
Set-ExecutionPolicy Unrestricted Type A for yes to all
wget "https://github.com/fireeye/flare-vm/raw/master/install.ps1" -UseBasicParsing-outfile C:\Users\quest\Destop\install.ps1 cd C:\Users\quest\Desktop dir ./install.ps1
Note: Change Users\quest to that of your system path
Enter your password, and proceed to download and install
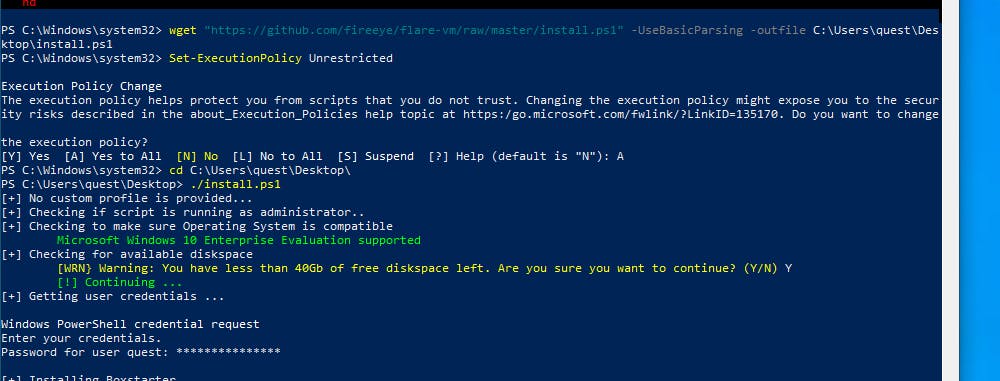
Note: It takes a long time Approx 2-5 hours or more depending on your internet and processor speed
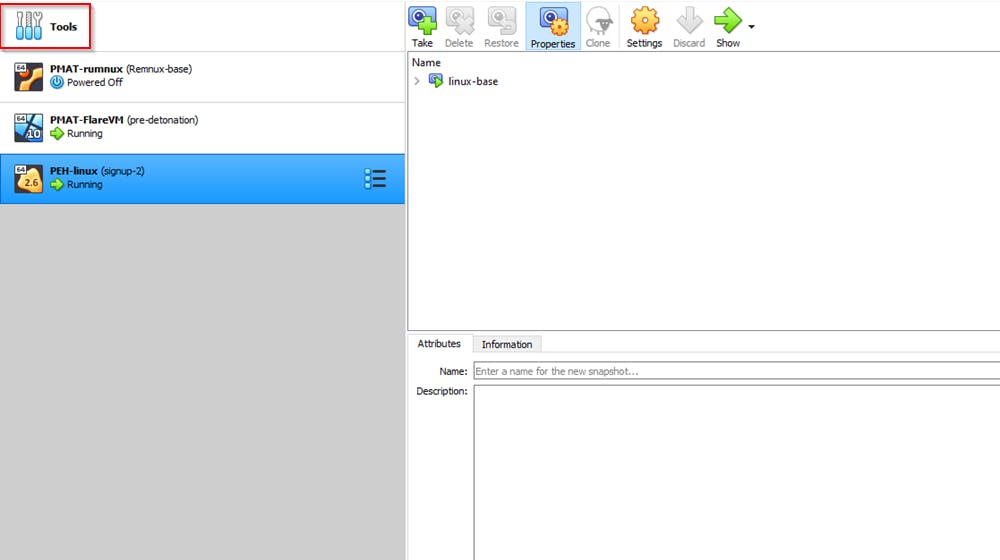
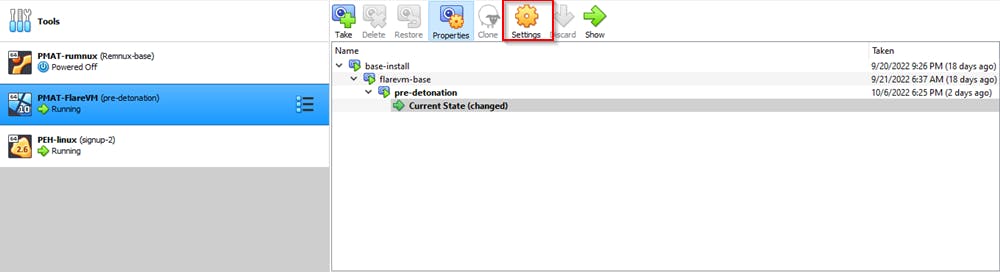
Now take a snapshot and name flarevm-base or any name that sounds appropriate to you.
Sourcing Malware Samples
Before we start detonating malware samples in our lab, we need to first get the malware samples we would be using before we lockdown everything.
Sources for malware samples There is no need to go into the dark web, maybe not yet. The clear web has some amazing resources from places such as;
Lenny Zeltser zeltser.com/malware-sample-sources
The zoo github.com/ytisf/theZoo
VX-underground github.com/vxunderground/MalwareSourceCode
PMAT labs https://github.com/HuskyHacks/PMAT-labs
Next, we download procmon from the sysinternals suit which you can download the entire Sysinternals suit.
The next Virtual machine we would be working on is setting up REMnux. REMnux is a Linux toolkit for reverse-engineering and analyzing malicious software. REMnux provides a curated collection of free tools created by the community. We're going to use it to investigate malware without having to find, install, and configure the tools. This video takes you through how to set up your REMnux box.
Network Settings for our lab environment
We want to detonate malware in an environment that is physically separated from our physical system but logically connected meaning Flare Vm and REMnux are going to be connected on a separate network from our host machine.
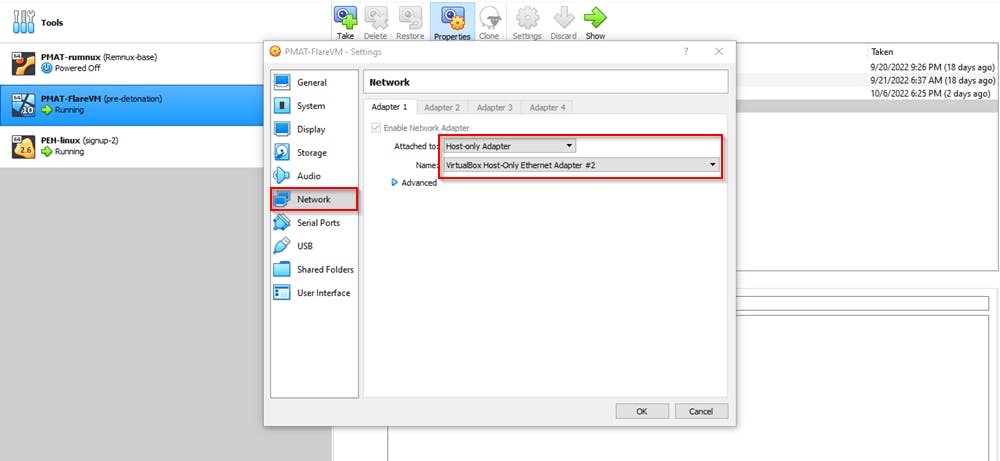
First Go to tools on Virtual box and select the Network tab. Make sure it's on the Host-only Adapter.
Click create to create a new host-only network adapter
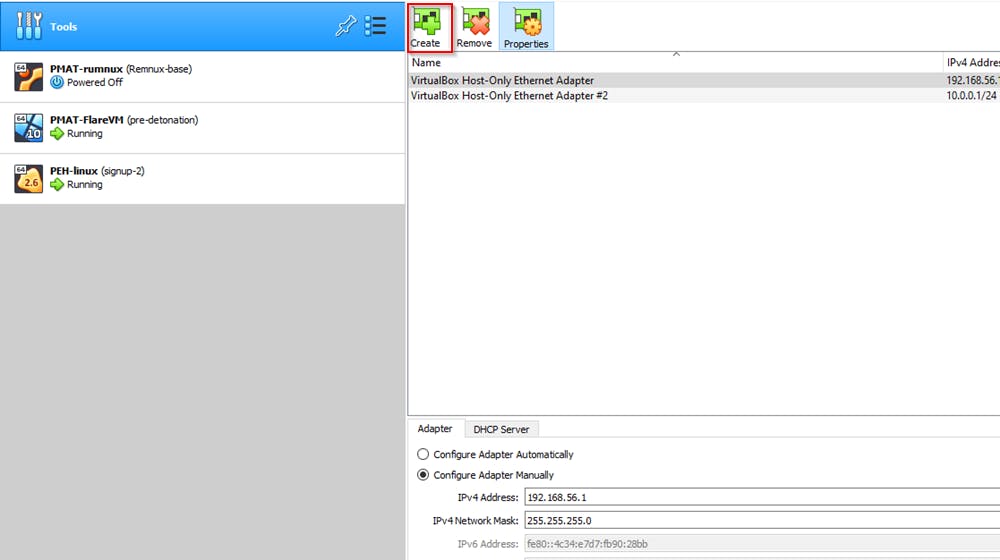
Configuring the Host-only Adapter
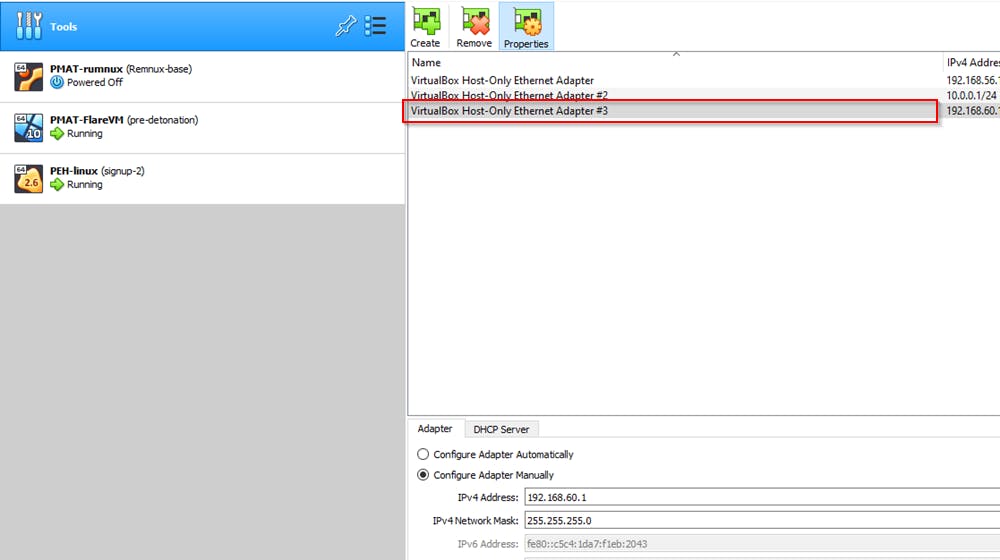
The IP address you choose for your VM should be different from your host IP address. Change the IP range so that it is noticeably different from your network.
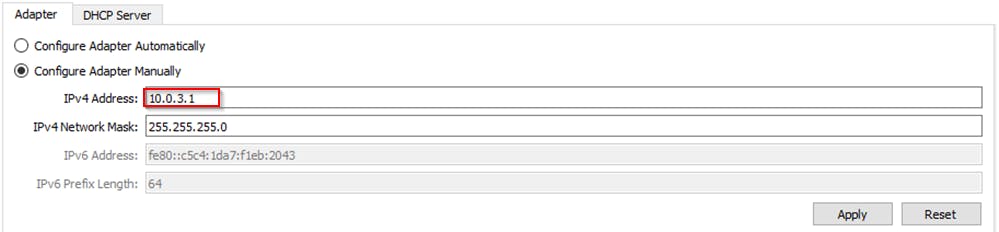
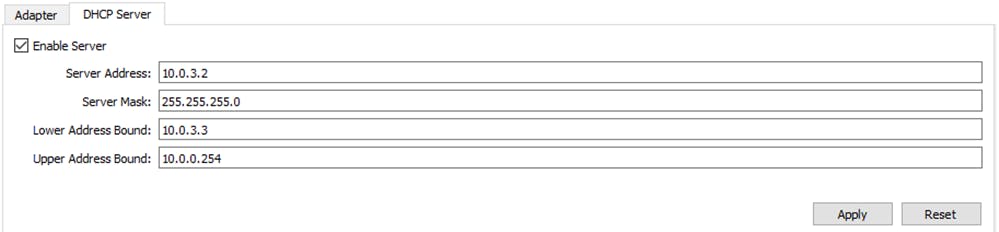
Enable DHCP to allow Virtual box to assign IP addresses automatically. Now we go ahead and configure our DHCP Server
Applying our network settings to our virtual machines.
Note: In the following screenshots, the IP addresses used are different from the above examples because I documented this first before going back to take notes on how to create our network adapters.
On each VM, navigate to the settings tab
Locate the network tab and from the "Attached to" drop-down menu, select Host-only adapter and from the "Name" section, select the adapter you just created.
To make sure the 2 machines are connected, go ahead and ping both IP addresses and ping google.com
If your results from pinging google results in this message pop up on your screen, then you're good to move on to the next step.
ping google.com
Ping request could not find host google.com. Please check the name and try again.
Setting a fake internet on REMnux
Rumnux which is a Linux-based operating system is going to run a service that simulates real internet situations called INetsim
INetsim helps us keep our environment safe from speaking to the outside world and help us capture and study network traffic. We also get dummy file downloads with no real effect when we're analyzing a dropper malware ( more on this later )
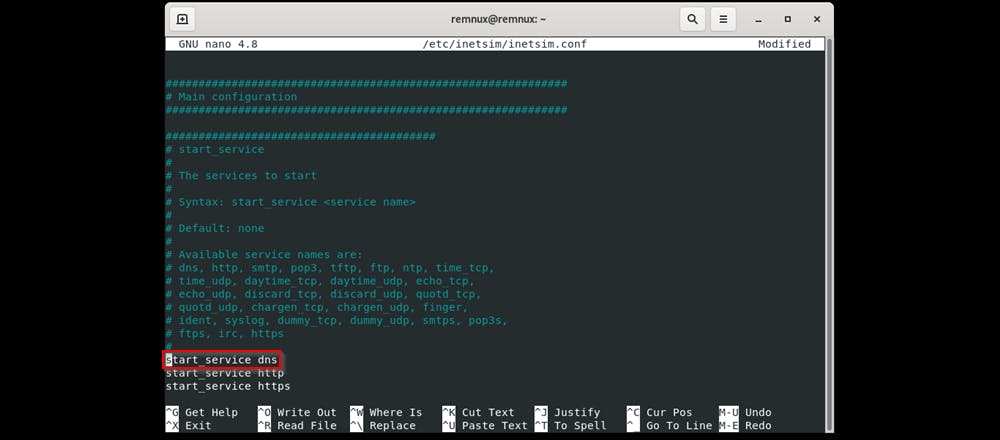
Run sudo nano /etc/inetsim/inetsim.conf to open up the configuration file for INetsim.
This is the config file inetsim uses
- Move down and uncomment start_service dns to make it active
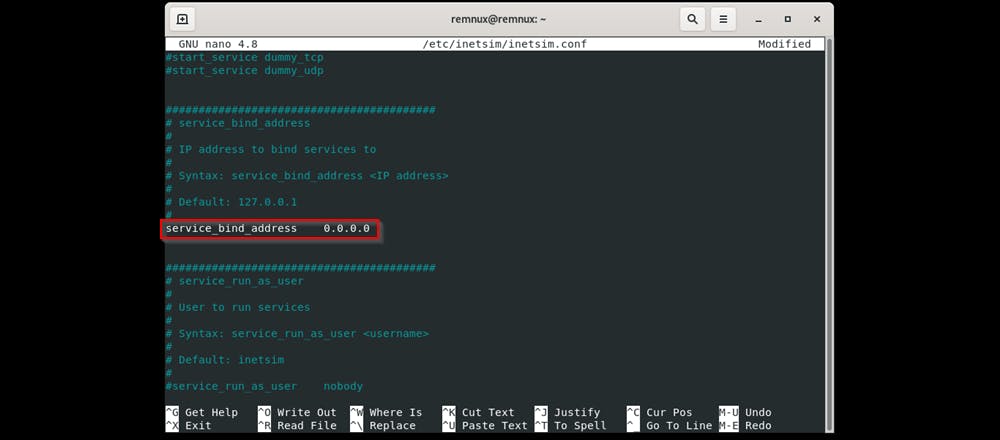
- Uncomment service_bind_address and change the IP address from 10.10.10.1 to 0.0.0.0 ( This binds all interfaces to the host )
Run
ip ato check the IP address on REMnux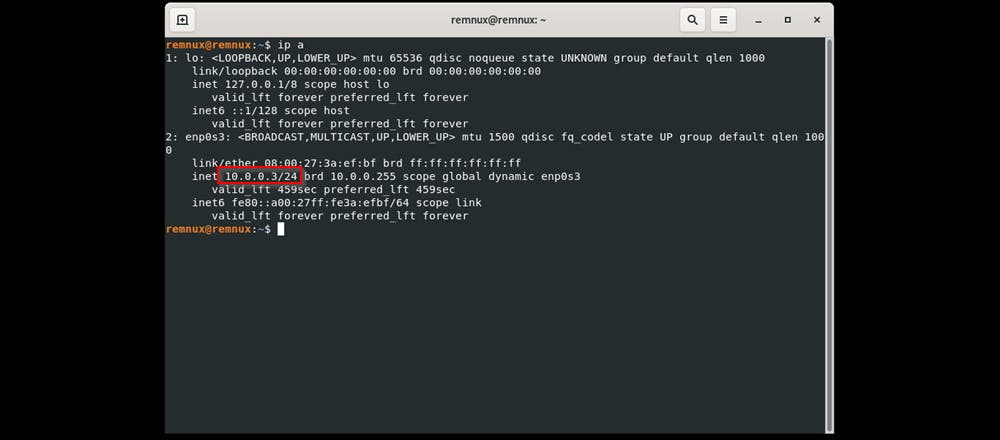
Change default dns to that of REMnux
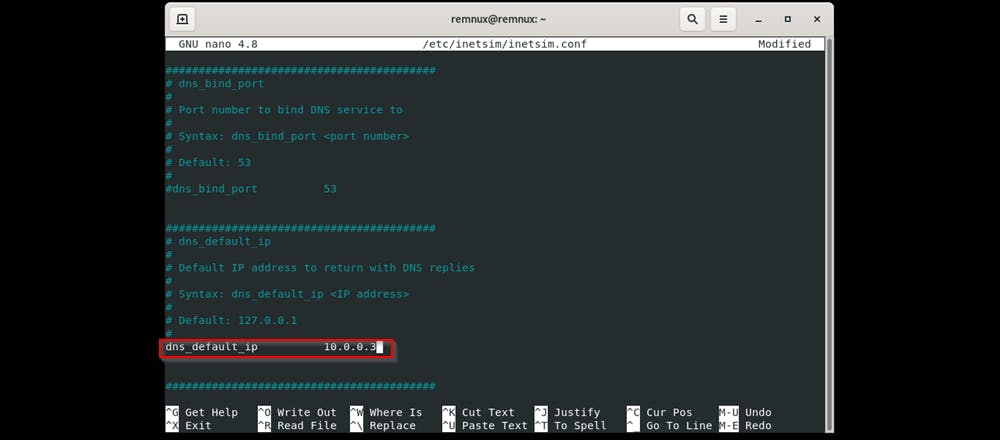
Press Ctrl + O to write to the file. Leave the file name as default and Ctrl + X to exit
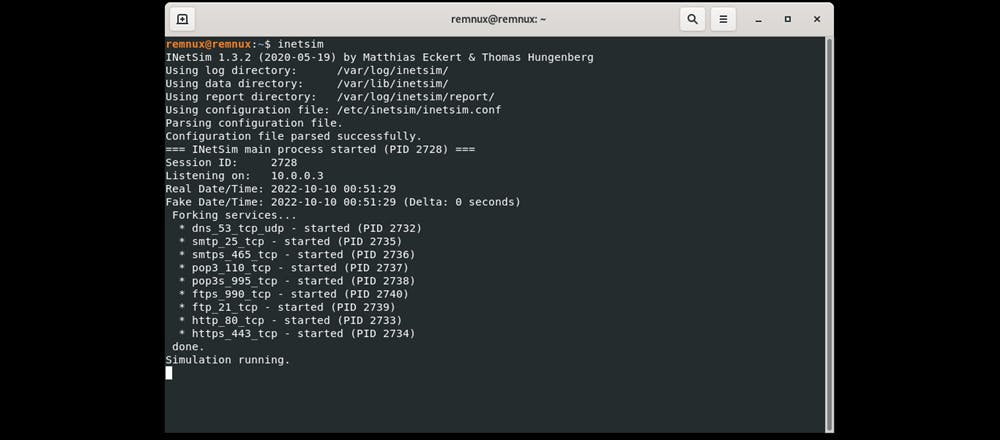
Run inetsim to test our fake internet
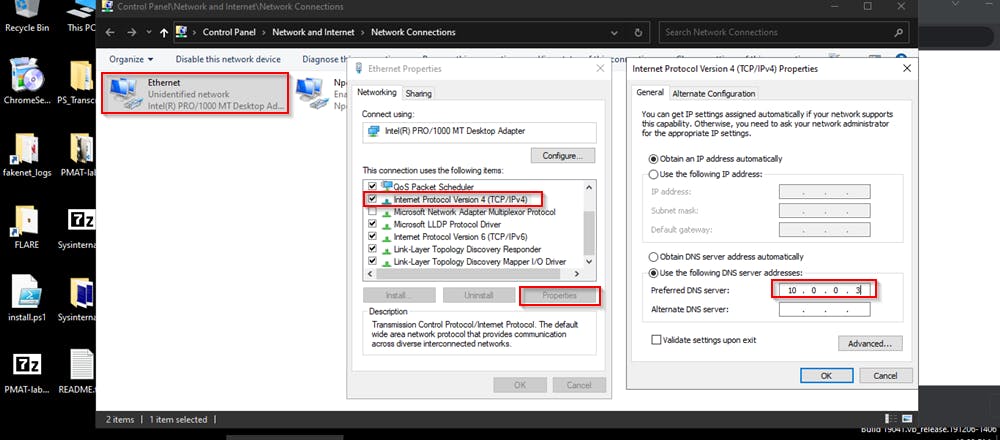
On our flare VM, let's change the preferred dns to that of inetsim
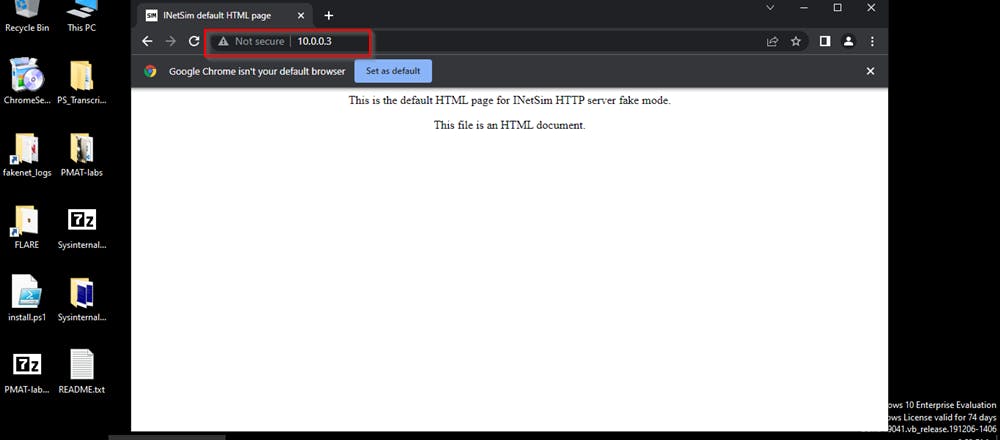
Move to flarevm and open a chrome instance and type 10.0.0.3 you should get a default inetsim instance.
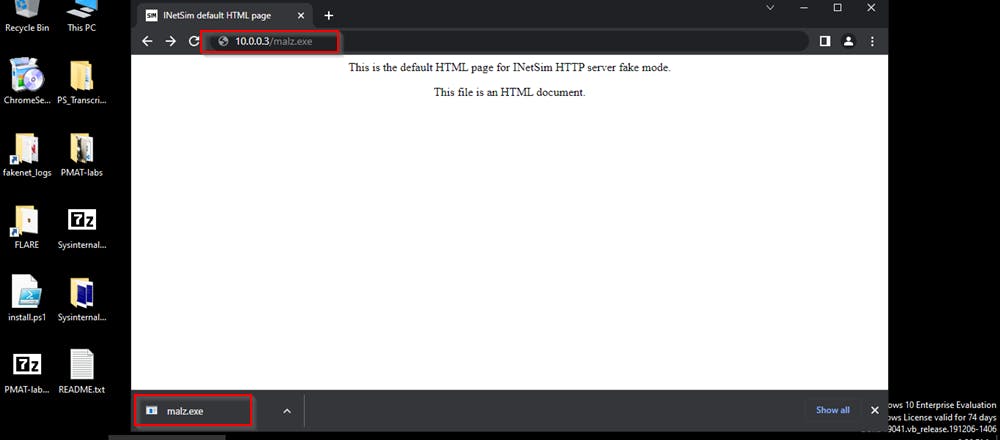
Say the malware reaches out for a second-stage payload, INetsim gives us a default GUI binary that looks like this.
Conclusion
At this point, we have our lab ready to detonate some life malware without infecting our host machine. As a final note, you should always have a good snapshot to revert to and have a backup of files should anything happen to your host machine.